
4.3
Owner's of the ADC Clothes Dryer AD-310 gave it a score of 4.3 out of 5. Here's how the scores stacked up:
99
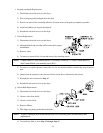
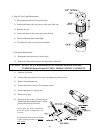
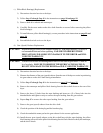
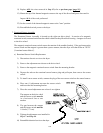
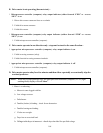
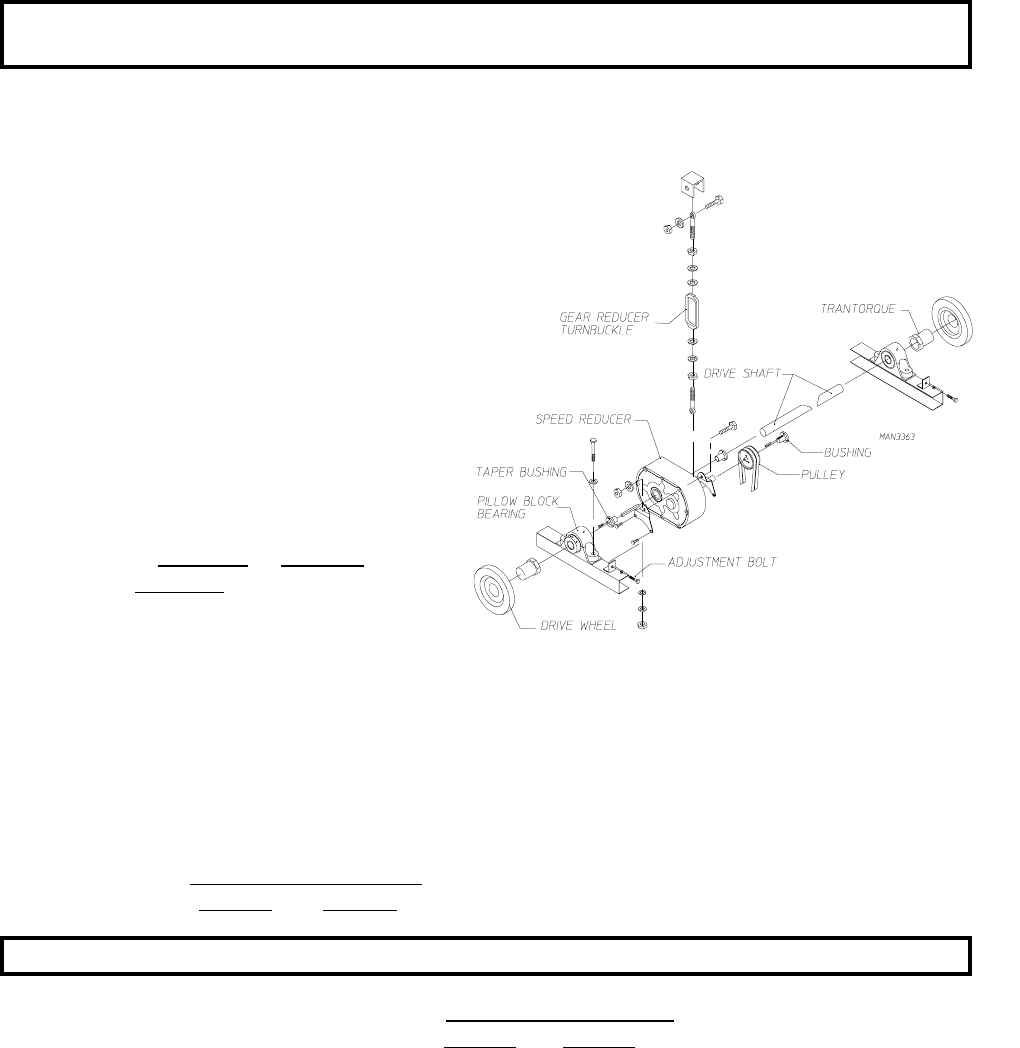
9) Lift the end of the drive shaft closest to the rear of the
dryer and pivot the other end of the shaft on the drive
wheel until the shaft can be removed from the dryer.
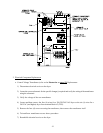
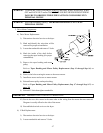
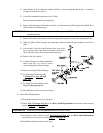
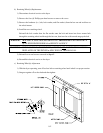
4) Insert blocks of wood under the tumbler (basket) - access through the lint drawer - to take the
weight off of the drive wheels.
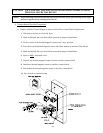
5) Loosen the turnbuckle and remove the V-belts.
Remove bottom turnbuckle mounting bolt.
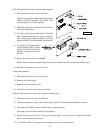
6) Remove the trantorque from the drive wheels. (A chain wrench will be required to hold the drive
shaft to remove the trantorque.)
IMPORTANT: On reinstallation, the trantorque must be torqued to 2,300 foot-pounds (259 n-m
(newton-meters).
7) Remove the bolts from the pillow block bearing mounting pads as well as the adjustment bolts.
8) Slide the pillow block bearings and trantorque inward towards the gear reducer on the drive
shaft.
10) Remove the drive wheel.
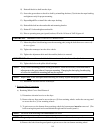
11) Carefully file the score marks on the drive
shaft from the set screws before
removing the pillow block bearings.
12) Remove the pillow block bearings.
13) For gear reducer removal, refer
to Section D on page 100 and
page 101.
15) Reestablish electrical service to the dryer.
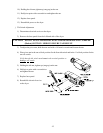
b) Drive Wheel Replacement
1) Discontinue electrical service to the dryer.
2) Follow
Step #2 through Step #10 in the Drive Shaft Replacement instructions in the previous
section (page 98 and page 99).
IMPORTANT: Both drive wheels should be replaced on the drive shaft.
3) To install new drive wheels, reverse Step #10 through Step #2 in the Drive Shaft Replacement
instructions in the previous section (page 99 and page 98).
4) Reestablish electrical service to the dryer.
14) To install new drive shaft, reverse
Step #13 through Step #2.


Find Your Products By Category
Please Login
