
0
Owner's of the ACS Clothes Dryer ACS Clothes Dryer gave it a score of 0 out of 5. Here's how the scores stacked up:
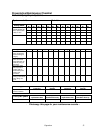
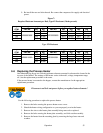


Before re-packing the beds, determine the proper amount of desiccant for the dryer being
serviced. See Figure 7 on the following page for more information. Desiccant can assemblies pre-
packed from the manufacturer are available and simply drop into the frame. Pre measures
desiccant kits are also available from the manufacturer.
5. Carefully place half of the large bead in the bottom of the beds, in an even layer, on the
bottom screen. Place the small bead on top of it, in an even layer. Carefully place an
even layer of the remaining large beads over the small beads.
6. Install the top screen, making sure that the edge is in contact with the sides of the bed all
the way around. Install the washers and nuts and tighten down. Gently tap the around the
sides of the desiccant canister with a rubber mallet to settle the desiccant. As settling
occurs, re-tighten the nuts. Repeat the tapping and tightening process until little
additional settling occurs.
7. Install the covers and gaskets on the beds, making sure they are tight and sealed. Replace
desiccant bed gasket if necessary.
8. Re-connect any hoses that were disconnected.
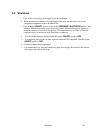
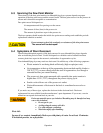
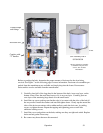
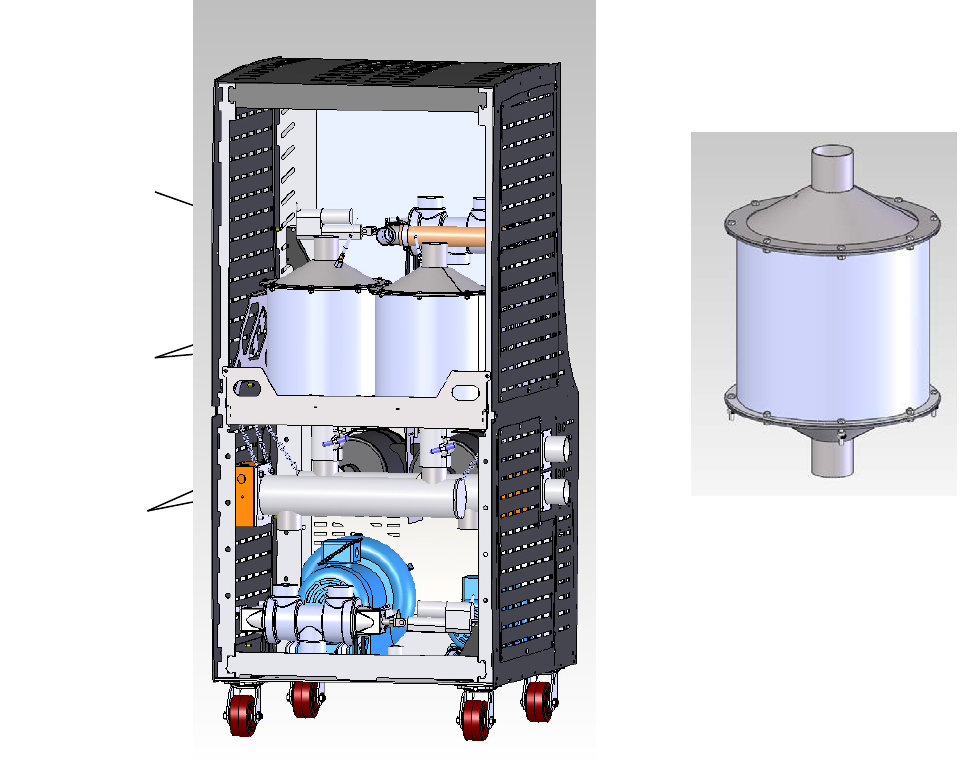
Desiccant cans
Couplers with
“T” handles
Thermocouple
and fittings
Knurled Nut
Can Assembly Part #
892.04505.00
The pre-packed can assembly
is available from parts and
service. See “Contact
Information”
Operation 54


Find Your Products By Category
Please Login
